
Every time I mentioned wanting to paint a chevron wall to anyone, I got similar reactions: "That sounds ambitious!" or "I'd never be patient enough for that!" or "Wow! Really?"
I read about a zillion tutorials about how to paint a chevron pattern on a wall and they basically boiled down to two categories: taping the wall by hand using painter's tape or using a stencil. The stencil method sounded way easier to me, so I purchased a large wall stencil from an online design company and waited for my mom to get here to help me tackle the project I was too scared to jump into by myself. And, because she is my mom, she actually agreed to help me do it, instead of saying, "Um . . . how about . . . no."
I've always been an over achiever, even when I leave something until the last minute. I'm a bit of a perfectionist who manages to produce good results under pressure.
In middle school, I once created an entire poetry notebook the night before the assignment was due. It was this huge project that we were supposed to be working on for half of the semester. I might have cried during the process, but it turned out amazingly awesome, and I scored over 100%. The teacher even made copies of my procrastinated project to show to future classes.
My freshman year of college I once started writing a research paper at five a.m., after waltzing into my dorm room sometime after four in the morning. It was due the same day. I got an A.
I would not say, however, that I work well under pressure. I kind of turn into a spastic monster and have multiple emotional meltdowns during the creative process.
The chevron wall project experience proved to be no exception to this rule.
My mom came for exactly one week. We tied up the beginning of her vacation with fun things, so when we got back from the beach it was time for me to put my hardcore perfection meets procrastination tendencies to work.
Kaden's room was a soft baby blue, and I'd decided to paint the chevron pattern navy and white. That meant we had to coat all the walls in white first. Wanting to save us some time, I splurged and bought the Behr premium paint. The kind that has primer in it, too, that everyone raves is the best stuff ever. According to Consumer Reports, it even beat out Sherwin Williams paint (which happens to be my favorite paint of all time, even though most of our renovation projects have been completed with Lowe's Valspar paint). I had visions of it possibly only taking one coat to cover the wall. I mean it only had to cover a soft baby blue! It ended up taking THREE coats of rolling and FOUR coats of cutting in to cover all the hint of the blue that kept showing through. Let's just say, Behr did not make a believer out of me, particularly not with the heftier price tag. This would have been bad enough, if we weren't in a time crunch, but we totally were (remember my mad procrastination skills). Add a toddler to the mix that we had to entertain in between all of the painting, and we were really having some fun. Most of the project ended up happening between the hours of nine in the evening and three in the morning, because it was so much easier to work with Kaden asleep.
So, let me give you a visual: I am seven months pregnant and a highly emotional basket case anyway, plus I am running on a self-induced little-to-no sleep schedule, covered in paint (which, as an aside, is still fused to some of my hair follicles by the way--always take a shower after painting, even if it's 3 in the morning and you think you don't care), and determined to finish a project that I now realize is going to be way more time intensive than I originally planned. Were there some tears shed? Well, not until the stenciling started.
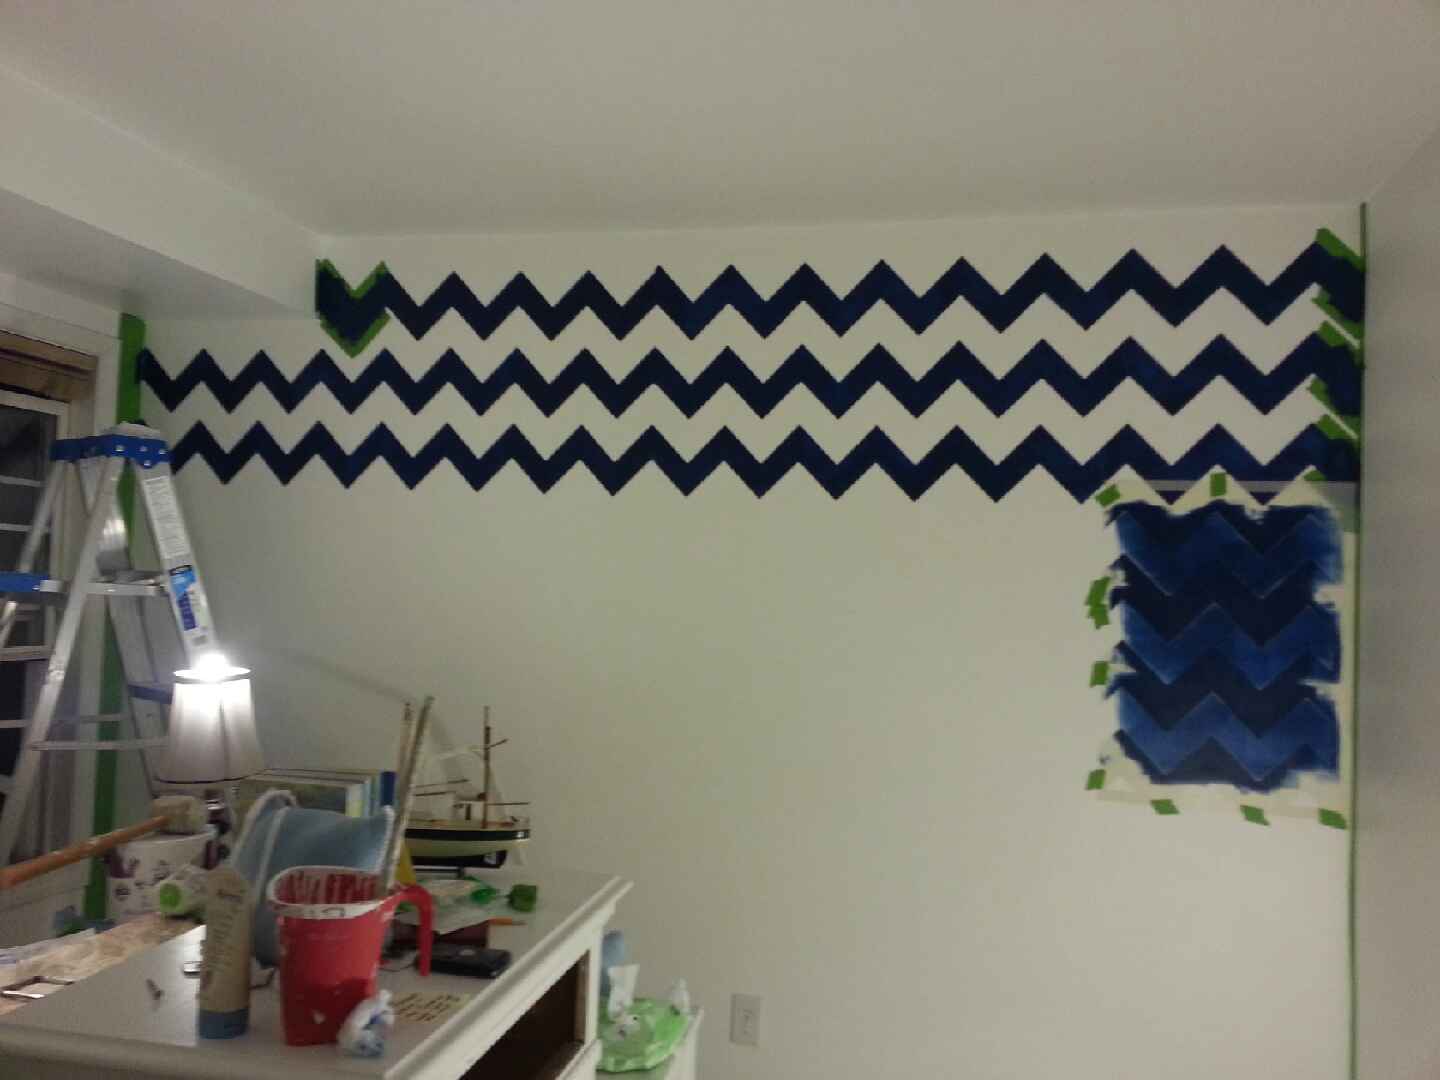
Kaden zonked out for a nap and we got right to work. My mom was leaving the next day at four in the afternoon. Crunch time had officially begun. The first couple of stencils went up fairly smoothly. There was some bleeding through the stencil, but even the expert on the YouTube videos I'd watched had warned to expect that. I knew I'd have to do some touching up later, so I tried not to panic.


We began by following the instructions included with the stencil with absolute exactness (I'm nothing if not a rule follower!). The stencil had to be sprayed with spray adhesive in a well-ventilated area, so before every application we would carry it downstairs and spray it outside. Then, we would line the stencil up and tape it in a few places to give it additional security. The roller had to be off-loaded onto paper towels before rolling the paint over the stencil (to help prevent the paint from being too thick and leaking underneath).

After the third application, things took a turn for the worse. The stencil wasn't lining up correctly, which made absolutely no sense. It wouldn't lay flat and kept bubbling in strange places. The spray adhesive wasn't working very effectively anymore and the stencil kept slipping, even with the extra tape trying to hold it in place. So I came up with the brilliant idea that we should rinse the stencil off in the bathtub. I figured it must be getting too heavy because of the buildup of paint on the front. So to the tub we went.

And that was the single worst idea I have ever had.

Even though it was latex paint that should have easily washed off, it got stuck to the spray adhesive on the back of the stencil that wouldn't wash off. And I got to scrape off all of those wet, sticky globs of paint with my finger nail. And the stencil still wouldn't go flat. It still bubbled. And my mom started suggesting that surely there was someone who would help me finish this project if we didn't get it done. And I sat on the edge of the bathtub and cried.
And then we cut the side of the stencil off to get it to semi-cooperate. We were rule breakers.

From here on out, it was super slow going. The stencil never actually matched up exactly right, so we had to use a ruler and measure the width of the chevron stripes and adjust it by hand. The paint didn't dry as quickly as the online tutorial had claimed it would, so we had to leave it on the wall after each application to give it time to dry before moving it again. We had to use painter's tape to fill in the gaps in areas the stencil wouldn't reach.
Kaden woke up from his nap, and he was so excited about his "pretty wall" that it kind of melted my heart just a little bit.


And the hours rolled on from there. It was a blur of navy paint, green Frog Tape (which DID make a believer out of me, by the way. I will NEVER buy the regular blue painters tape again after this experience), and pure exhaustion.

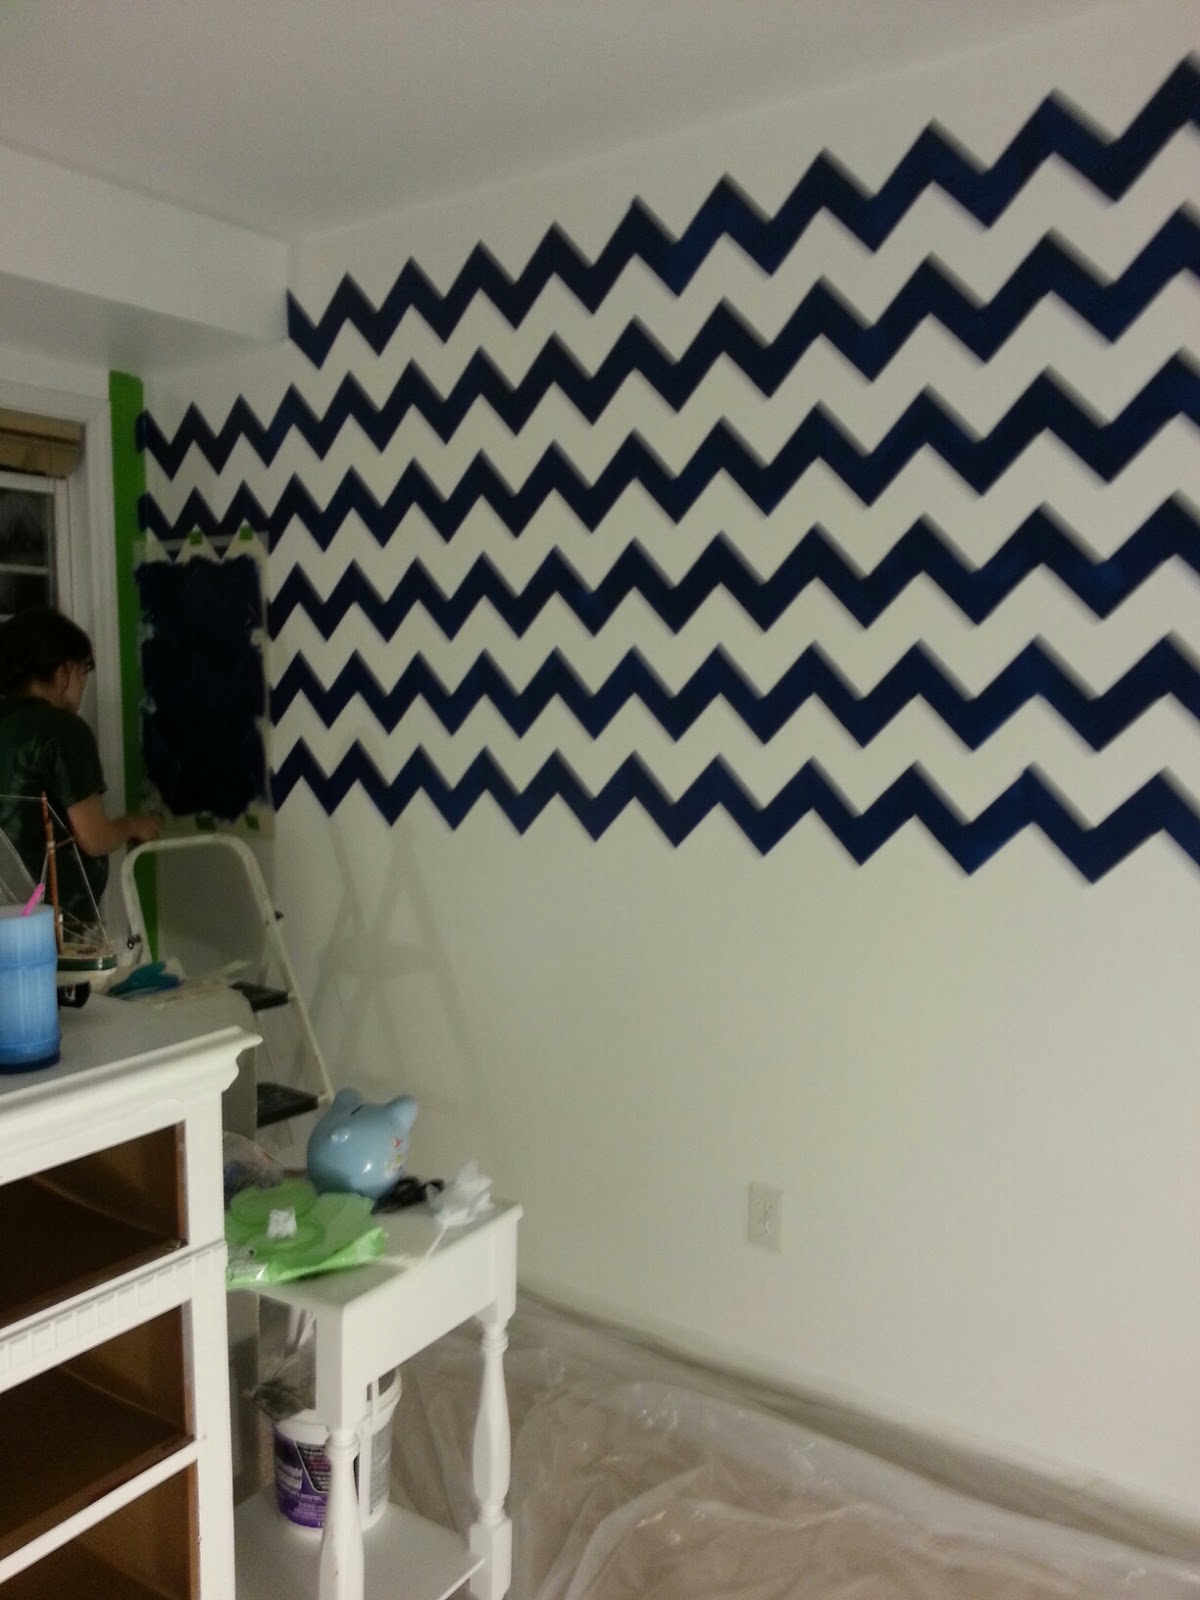

I literally painted the second coat on the last few hand-taped stripes minutes before driving my mom to the airport, but somehow we magically finished.
The next day, I took down the painter's tape, touched up some of the areas where the paint had bled under the stencil, and voila! Kaden's big boy room was complete. It honestly looks so much cuter in person. I don't think pictures do it justice, but I'm posting them anyway.
We used our old Ikea office chair and spray painted it red. I still need to find a lamp for his bedside table. We have a headboard and foot board (white) but are still looking for a frame to attach it to, so for now, Kadester has the mattress and box springs on the floor.

I snagged almost all of the throw pillows and the comforter from Joy's attic. No, that's not an actual store, it is my mother-in-law's attic . . . which is better. And free.

I repainted his dresser to match the new color scheme and picked up some fun baskets from Home Goods for extra storage for books and toys. We still need to replace the blinds with white ones. The hat stand was his Uncle Cameron's when he was a little boy, and Kaden is kind of obsessed with wearing hats lately.


These shelves hung in my father-in-law's room when he was a little boy! The boats were some of Kade's Uncle Tyler's.

And of course, Kaden's amazing bookshelf (handmade by his Poppy) had to stay!

And even though it was super hard and my body hurt for like a week afterwards, somehow, the fact that Kaden loves it so much almost makes it worth it.


But I won't be painting any other chevron walls in the near future.
Or ever, ever again.
First: It looks amazing, and I love his room. Seriously, you did such a great job. Sorry it was a total nightmare.
ReplyDeleteSecond: I hate you for being able to whip out awesome papers in no time. I guess that's why you were an English major and I wasn't. Okay, I don't hate you, but I am jealous =)
I love his room! It looks like a picture right out of a magazine. Nicely done Katie.
ReplyDeleteI'm planning on doing a chevron wall and... you didn't convince me not to (this coming from the woman who just last week decided I would never again paint a ceiling.) I can't see past the result. It's adorable! You did however convince me that I will not be using a stencil...
ReplyDeleteIt looks DARLING!!!! I can't even imagine how much work that must have been, but it turned out perfectly. Wish I could see it in person to witness it in all its glory!
ReplyDeleteWow Kaite! I am now on my third color of paint in Edyn's room but I realize that I now have no reason to complain. That looks so awesome but the process looked so painful. His room is so cute. And so is he. And is your belly. I miss you and hope you recover soon!
ReplyDeleteWowee. That's some serious DIY action.
ReplyDelete